Lighting a golf simulator bay
How to light a golf simulator bay: 3000–4000K fixtures, glare control on the screen, camera-friendly dimming, and installed costs.
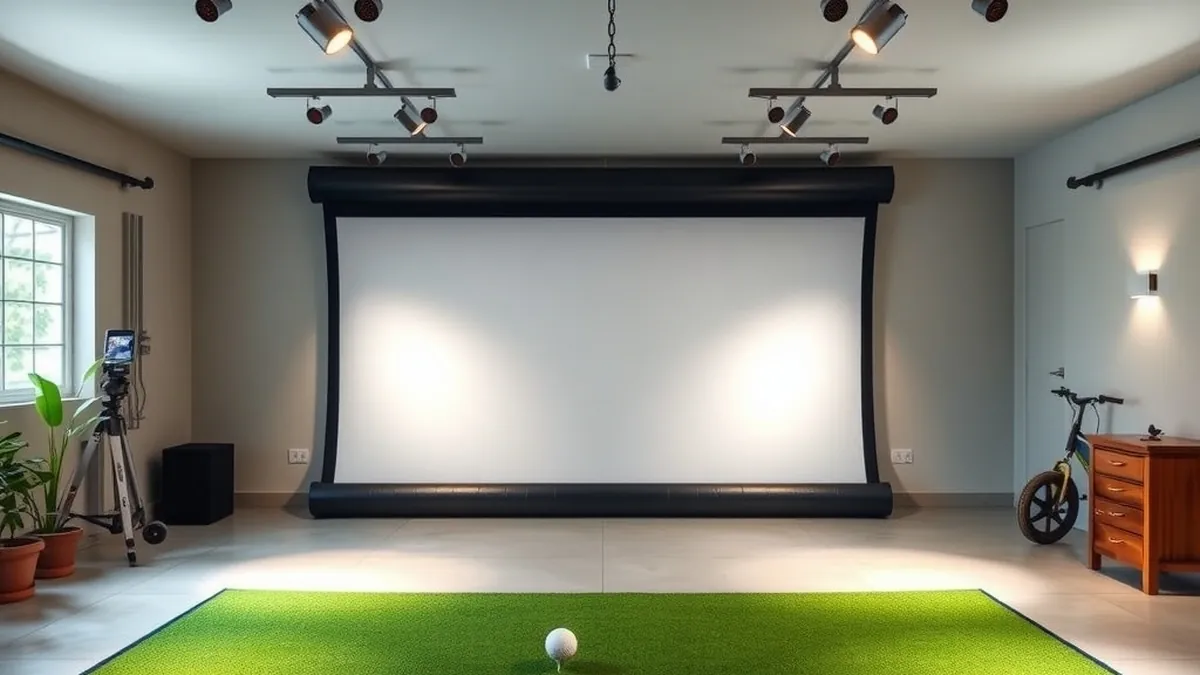
Light a simulator bay with 3000–4000K dimmable fixtures on two circuits, keep every beam off the impact screen, and aim task light at the mat. Budget $350–$1,300 for a typical garage bay.
- Color temperature
- 3000–4000K, CRI 90+
- Circuits
- Two: screen zone and task zone
- Typical cost
- $350–$1,300 installed
- Rule
- No direct light on the screen
Some links on this page are affiliate links.If you buy through them we may earn a commission at no extra cost to you. We do not accept payment for rankings. Read the full disclosure.
A simulator bay needs two kinds of light: enough ambient light to walk, set up, and putt, and as little direct light on the impact screen as possible. The workable formula is 3000–4000K fixtures on separate dimmable circuits, aimed away from the screen, with the projector as the brightest thing in the room during play.
Ambient light is the general illumination that fills the room; direct light is any fixture whose beam lands on the screen, the ball, or the player’s eyes.
Ambient light versus direct light
A front-projection screen is a reflector. Every lumen that hits it raises the black level, and black level is half of contrast. That is why a bay with six bright downlights can look worse than the same bay with two dim ones, even though the projector has not changed.
Split the room into three lighting modes. Play mode is dim: the screen should be the brightest object in the room, and the mat should be just bright enough to see the ball. Practice mode adds light on the putting line and alignment aids. Work mode is full brightness for cleaning, setup, and repairs.
Indirect light is the useful kind. A cove wash, a wall washer aimed at the back wall, or a fixture bounced off the ceiling gives you visibility without a beam crossing the screen. Direct light belongs on the mat, the keyboard, and the path to the door, not on the projection surface.
Color temperature: 3000–4000K
Stick to 3000–4000K. A 2700K lamp is warm enough that a white screen reads cream, and turf looks brown under it. A 5000K or 6500K shop light is blue-heavy, harsh at night, and makes the room feel like a garage rather than a bay.
3000K suits a lounge-style bay with seating and a bar. 3500K is the neutral middle for mixed use. 4000K works best where the bay doubles as a practice room and you want crisp task light on the mat. Keep one temperature across the room; mixing 3000K and 5000K in the same sightline looks wrong and complicates camera white balance.
Two specifications matter as much as color temperature. Look for CRI 90 or higher so turf, screen graphics, and skin tones render correctly. Look for flicker-free drivers, because high-speed cameras and slow-motion replay can pick up flicker that your eye ignores.
Keeping glare off the screen
Glare is direct light reflecting off the screen into your eyes. A matte screen reduces it but does not eliminate it. The fix is geometric: keep fixtures out of the projector’s cone and out of the player’s sightline.
Three placement rules cover most bays. First, no fixture between the projector and the screen. Second, no fixture in front of the screen within roughly 45 degrees of where the player stands at address. Third, aim track heads at the floor or the back wall, never level at the screen.
Use deep-cell louvers, barn doors, or baffles on any fixture you can see from the mat. A bare LED spot at eye level will show up in your follow-through and in every photo you take of the bay. Finish the screen surround and frame in matte black or dark gray; a glossy white frame bounces light back onto the screen edges.
The monitor and PC are light sources too. Turn display brightness down, use a dark interface, and put the monitor outside the hitting zone so its glow does not spill across the screen.
What camera-based monitors need
Radar monitors such as TrackMan and Garmin do not care about room light. They measure the ball with radio waves, so you can play in near darkness.
Camera-based monitors are different. Overhead units such as Uneekor and photometric units such as Foresight need even illumination across the ball and club. A hard spotlight over the ball casts a shadow into the camera’s view, and a dimmer at low output can introduce banding. Check the manufacturer’s installation manual for the recommended light level and mounting height before you finalize fixtures.
The practical rule is diffuse, stable, and consistent. Diffuse overhead light with no hard shadows, stable output that does not flicker, and the same light level during calibration and play. If you calibrate with the lights at full brightness and then play at 20 percent, expect the camera to see a different scene.
Circuits, dimmers, and controls
Run at least two lighting circuits: one for the screen zone and one for task light. That lets you kill the screen wash without losing the path to the door. A third circuit for accent or seating light is nice but optional.
LED loads are small, so a 15-amp circuit is usually plenty for the whole bay. The cost is in the wiring run, not the breaker. A licensed electrician should add the circuit, and local code decides whether you need AFCI or GFCI protection, conduit, or a permit.
Dimmers need to match the LED driver. Cheap leading-edge dimmers buzz and flicker at low output; trailing-edge dimmers and dimmers listed by the fixture manufacturer behave better. Smart dimmers usually need a neutral wire at the switch box, which older garages often lack.
Put the controls at the door, not behind the screen. A scene controller with Play, Practice, and Clean buttons is easier to use than four separate dimmers, and it keeps you from walking through the hitting zone to change the light. Keep one non-dimmed path light on a normal switch so you are never dependent on an app to find the exit.
Layouts, track lights, and budget
Track lighting is the most flexible choice for a bay because you can re-aim it after the enclosure goes in. Use a track along the back wall and one along each side, with heads aimed at the mat and the floor. Keep the track at least 3 ft behind the player’s stance and outside the projector’s throw.
| Layout | Fixtures | Controls | Best for | Installed cost |
|---|---|---|---|---|
| Basic | 4 recessed cans, 1 circuit | One dimmer | Single-purpose garage bay | $350–$650 |
| Two-zone | 6 track heads, 2 circuits | Two dimmers | Most home builds | $700–$1,300 |
| Layered | Cove, 6 track heads, 2 circuits | Scene controller | Lounge-style bay | $1,500–$3,000 |
| Designed | Cove, track, wall wash, 3 circuits | DMX or app scenes | High-end build, camera work | $3,000–$6,000 |
Fixture prices drive most of the spread. A usable 12W LED track head runs $40–$120; track is $20–$40 per foot; a dimmer is $25–$60. A new circuit from a licensed electrician is commonly $400–$900 depending on panel distance and wall access.
Running costs are trivial. Six 12W heads at 2 hours a day use 144Wh daily, or about 4.3 kWh a month. At $0.17 per kWh that is roughly $0.73 a month. The projector, at 300–500W, costs far more to run than the lights.
Before you buy fixtures, confirm the throw distance and screen size in our projector guide, and check that the bay’s room dimensions leave a mounting point outside the hitting zone. If the ceiling is tight, the layout advice in the ceiling height guide applies to surface-mounted track as well.
The short version
Light the room, not the screen. Use 3000–4000K, CRI 90 fixtures on two dimmable circuits, keep every beam off the impact screen, and put task light on the mat and the door. Budget $350–$1,300 for a normal garage bay and skip the 5000K shop lights.
Frequently asked questions
How bright should the lights be during play?
Dim enough that the projection screen is the brightest object in the room, but bright enough to see the ball and the edge of the mat. Indirect light is best; any fixture aimed at the screen raises the black level and flattens contrast.
Can I use 5000K shop lights in a simulator bay?
They work for construction and cleaning, but they are harsh for play, make turf look gray, and compete with the projector's white point. Use 3000–4000K for the room and keep the 5000K fixtures for the workbench, if you have one.
Do LED dimmers cause flicker on a launch monitor camera?
Some do. Cheap leading-edge dimmers and low-quality drivers can flicker at low output, which shows up as banding in high-speed camera footage. Use flicker-free dimmable drivers, a trailing-edge dimmer, and avoid dimming below about 10 percent.
Does a launch monitor need special lighting?
Radar units such as TrackMan and Garmin do not need light at all. Camera-based and photometric units need even, stable illumination across the ball and club, so check the manufacturer's installation manual for the recommended level and mounting height.
Should the lights be on a dimmer?
Yes. A dimmer lets you run play mode, practice mode, and cleaning mode from the same fixtures. Put the controls at the door and keep one non-dimmed path light on a normal switch so you can always find the exit.
How much does simulator lighting cost?
A basic four-fixture layout on one dimmer runs about $350–$650 installed. A two-zone track layout with six heads runs $700–$1,300. Cove lighting, scene control, and design fees push a high-end bay to $3,000 or more.
Sources
Some links are affiliate links.If you buy through them we may earn a commission at no extra cost to you. We do not accept payment for rankings. Read the full disclosure.